반응형 뷰 포트는 굳이 따로 연결안해도 기본으로 연결되어있음
https://developer.mozilla.org/en-US/docs/Web/HTML/Viewport_meta_tag
Viewport meta tag - HTML: HyperText Markup Language | MDN
This article describes how to use the "viewport" <meta> tag to control the viewport's size and shape.
developer.mozilla.org
파비콘 만드는 사이트 ↓
https://www.favicon-generator.org/
Favicon & App Icon Generator
Upload an image (PNG to ICO, JPG to ICO, GIF to ICO) and convert it to a Windows favicon (.ico) and App Icons. Learn more about favicons.
www.favicon-generator.org
파비콘 만드는 법

1. 만들고 싶은 파비곤 png, Jpg 파일 선택해서 업로드 후 Create Favicon 버튼 클릭
2. 이렇게 만들어지면 Download the generated favicon 다운 링크 클릭해서 파일 다운받고, link 태그 복사
3. 프로젝트로 와서 다운받은 파비콘 파일 프로젝트에 넣어주기
4. index.html 링크에 파비콘 링크 넣어주고 href 경로 맞춰주기
font Awesom 6 아이콘 검색 페이지 ↓
https://fontawesome.com/v6/search?m=free
Font Awesome
The world’s most popular and easiest to use icon set just got an upgrade. More icons. More styles. More Options.
fontawesome.com
1. font Awesom 6 연결 링크 (index.html 링크에 추가)
<link rel="stylesheet" href="https://cdnjs.cloudflare.com/ajax/libs/font-awesome/6.1.0/css/all.min.css" integrity="sha512-10/jx2EXwxxWqCLX/hHth/vu2KY3jCF70dCQB8TSgNjbCVAC/8vai53GfMDrO2Emgwccf2pJqxct9ehpzG+MTw==" crossorigin="anonymous" referrerpolicy="no-referrer" />2. 원하는 아이콘 검색하고 적절한 아이콘 찾기
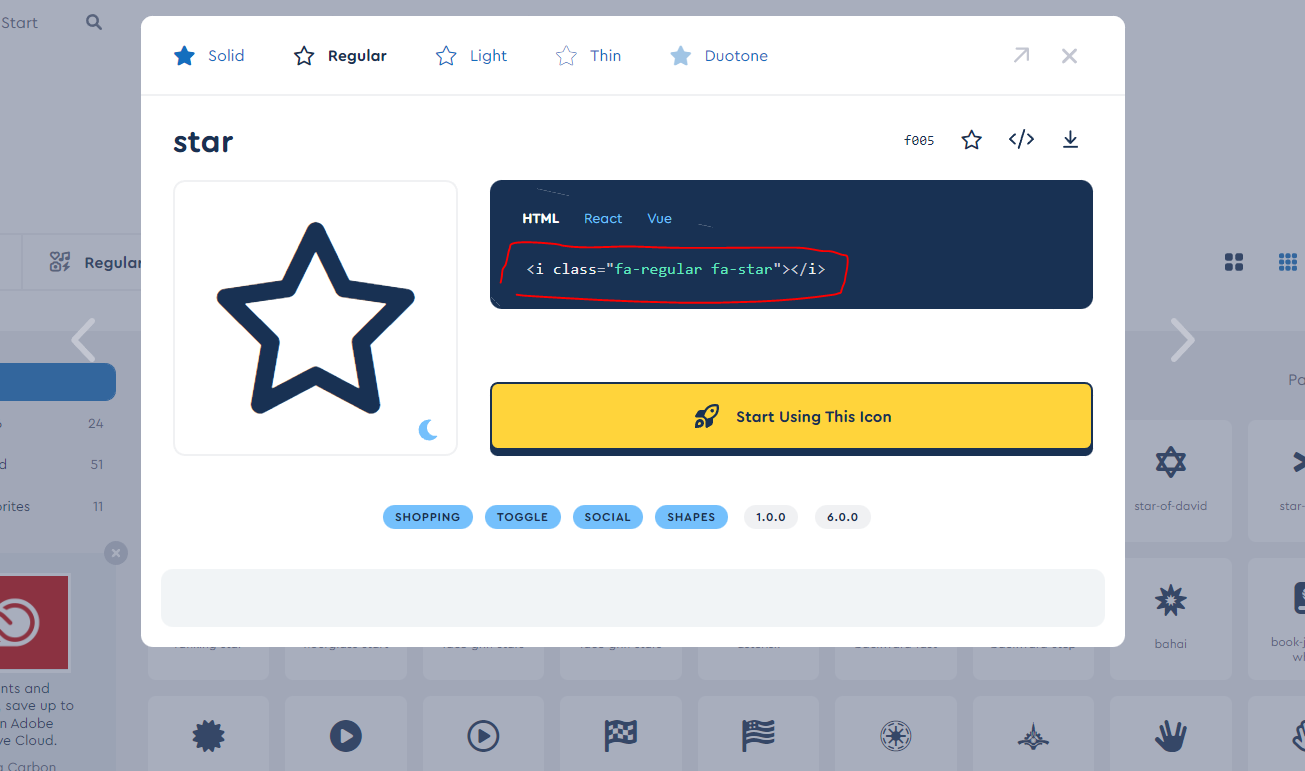
3. 아이콘 정했으면 태그 복사해서 프로젝트에 넣기

4. 이런식으로 아이콘 쉽게 사용가능
웹 폰트 무료 사이트 (구글폰트)
Google Fonts
Making the web more beautiful, fast, and open through great typography
fonts.google.com
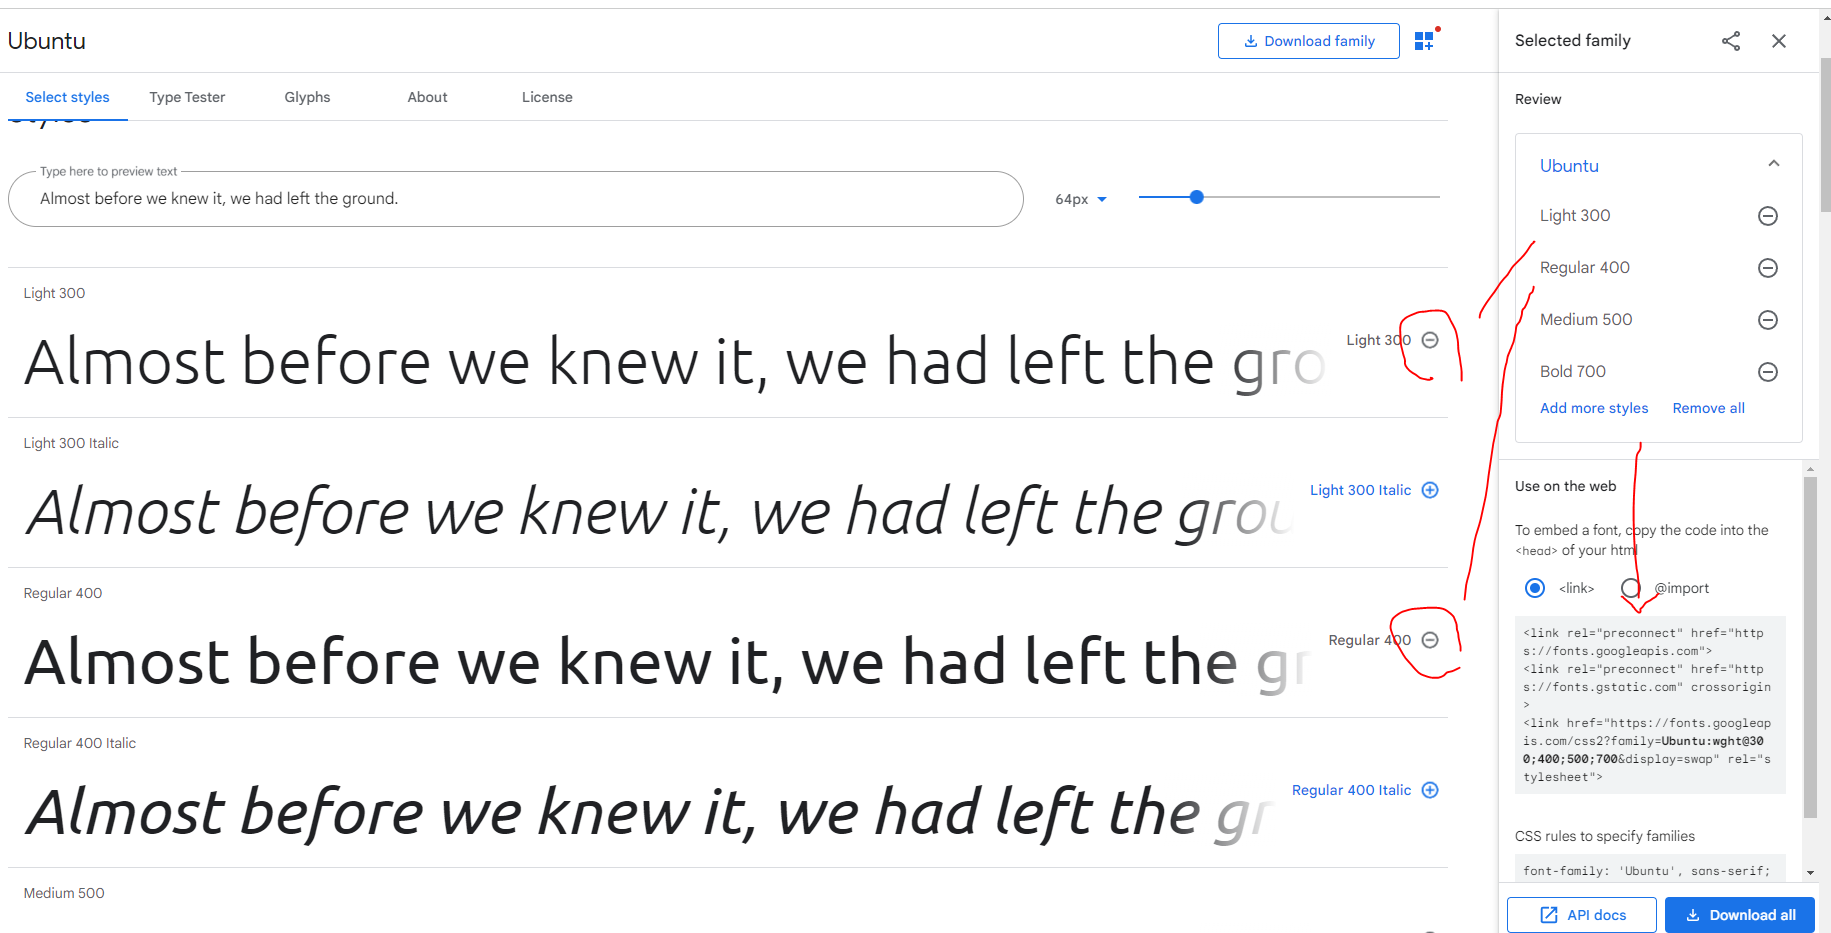
1. 들어가서 원하는 폰트 찾고 그 폰트 굵기 원하는것 다 선택하면 Link로 가져가서 쓸수있음
<index.html>
위에 링크들 다 넣은 html 모습
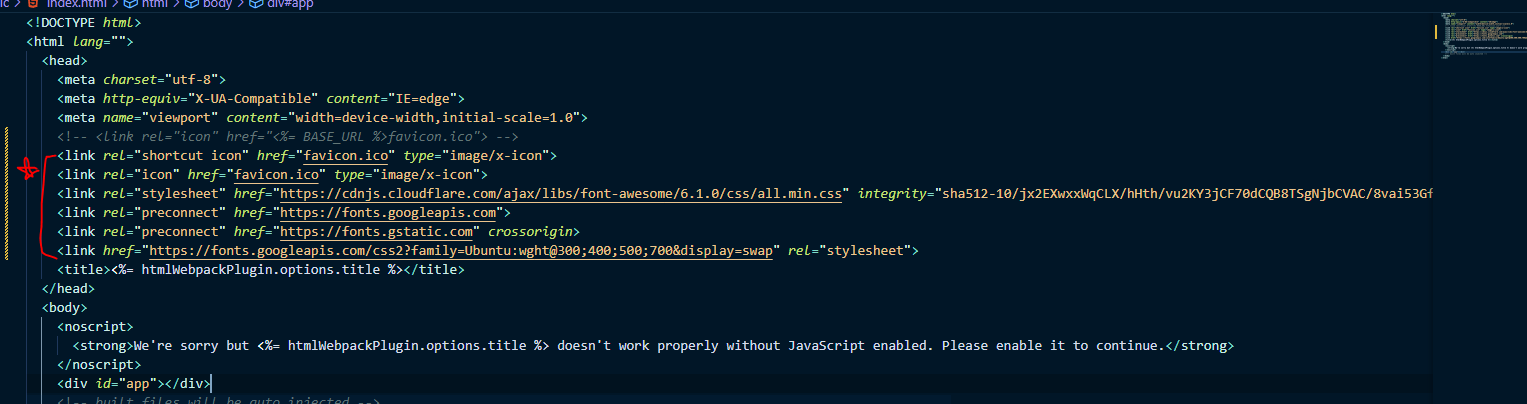
<!DOCTYPE html>
<html lang="">
  <head>
    <meta charset="utf-8">
    <meta http-equiv="X-UA-Compatible" content="IE=edge">
    <meta name="viewport" content="width=device-width,initial-scale=1.0">
    <!-- <link rel="icon" href="<%= BASE_URL %>favicon.ico"> -->
    <link rel="shortcut icon" href="favicon.ico" type="image/x-icon">
    <link rel="icon" href="favicon.ico" type="image/x-icon">
    <link rel="stylesheet" href="https://cdnjs.cloudflare.com/ajax/libs/font-awesome/6.1.0/css/all.min.css" integrity="sha512-10/jx2EXwxxWqCLX/hHth/vu2KY3jCF70dCQB8TSgNjbCVAC/8vai53GfMDrO2Emgwccf2pJqxct9ehpzG+MTw==" crossorigin="anonymous" referrerpolicy="no-referrer" />
    <link rel="preconnect" href="https://fonts.googleapis.com">
    <link rel="preconnect" href="https://fonts.gstatic.com" crossorigin>
    <link href="https://fonts.googleapis.com/css2?family=Ubuntu:wght@300;400;500;700&display=swap" rel="stylesheet">
    <title><%= htmlWebpackPlugin.options.title %></title>
  </head>
  <body>
    <noscript>
      <strong>We're sorry but <%= htmlWebpackPlugin.options.title %> doesn't work properly without JavaScript enabled. Please enable it to continue.</strong>
    </noscript>
    <div id="app"></div>
    <!-- built files will be auto injected -->
  </body>
</html>'vue.js > vue.js 2' 카테고리의 다른 글
| 39. transitions | vue에서 제공하는 transition 기능 (0) | 2022.07.31 |
|---|---|
| 38. <vue-todo> 사용자 경험 개선 | Modal 컴포넌트 등록 | slot (0) | 2022.07.31 |
| 34. vue-todo 프로젝트 | 컴포넌트 생성 및 등록 (0) | 2022.07.23 |
| 33. 컴포넌트 설계 방법 (0) | 2022.07.18 |
| 13. 라우터 정리 및 학습 방향 (0) | 2022.07.09 |